
This post contains affiliate links. We may earn a commission if you click on them and make a purchase. It’s at no extra cost to you and helps us run this site. Thanks for your support!
The back of a t-shirt is one of the most overlooked surfaces in apparel design. Brands fight for attention on the chest, but the back panel? That’s where the real storytelling happens. Large-scale graphics, vertical type, oversized illustrations — the back of a shirt offers a canvas that most designers barely exploit. And yet, when you need to present that back design to a client, a buyer, or your own Instagram audience, the quality of your mockup makes or breaks the impression. This t-shirt back view Photoshop mockup from Adobe Stock contributor 72 addresses that gap directly. It’s a clean, high-resolution, model-worn mockup that treats the rear panel as the visual centerpiece it deserves to be.
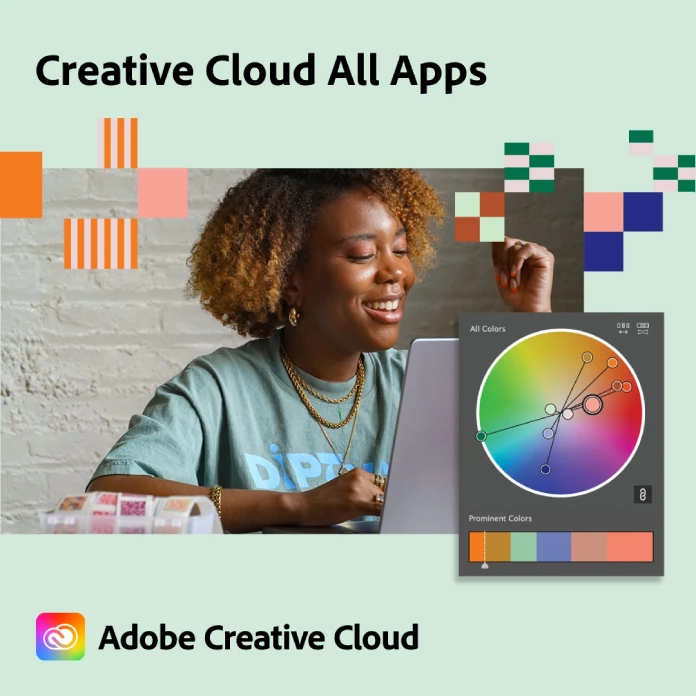
Please note that these templates require Adobe Photoshop. The latest version can be downloaded from the Adobe Creative Cloud website; visit this link.

So why does this particular t-shirt mockup stand out in a market flooded with options? Let’s get into it.
What Makes a T-Shirt Back View Mockup Worth Using Over a Generic Template?
Most free mockups have a common problem: they look like mockups. The lighting is flat, the fabric has no weight, and the overall image reads as a render rather than a photograph. The moment a client or customer recognizes a template, the perceived value of your design drops. That’s a real problem if you’re selling streetwear, pitching a brand concept, or launching a merch line.
This t-shirt back view Photoshop mockup avoids that trap entirely. Furthermore, it does so with remarkable subtlety. The model wears an oversized, relaxed-fit tee in a muted sage green. She faces away from the camera at a slight three-quarter angle. Her dark hair falls naturally over the collar. The background is a seamless neutral light gray — clean, minimal, and completely non-distracting.
Together, these choices create what I call the Neutral Ground Staging principle: stripping the scene of any visual noise so that the garment and its design carry 100% of the viewer’s attention. It sounds obvious. In practice, very few mockups execute it this well.
The Rear Canvas Principle: Treating the Back Panel as Prime Real Estate
There’s a broader design philosophy at work here, and it’s worth naming explicitly. I call it the Rear Canvas Principle — the idea that the back of a t-shirt functions as an independent visual field, separate from and often more expressive than the chest. Streetwear labels understood this years ago. The oversized back graphic became a signature move for brands like Supreme, Palace, and Cactus Plant Flea Market.
But this principle applies equally to independent designers, small brands, and print-on-demand sellers. If you’re designing a collection and you skip the back view presentation, you’re presenting only half the product. Moreover, back-facing mockups tend to photograph more cleanly than front views, because there’s no face to compete with the design for attention.
This mockup leans into that logic. Consequently, it gives you a presentation tool that genuinely elevates back-panel typography, oversized artwork, and vertical graphic compositions.
A Detailed Look at the Mockup’s Visual Properties
The resolution alone sets this file apart from most commercial alternatives. At 5056 × 3392 pixels, this is a high-fidelity file built for both screen and print workflows. You’re working with enough pixel depth to export for billboard visuals, retail signage, or full-bleed magazine spreads — not just social media posts.
The model’s oversized fit is a deliberate stylistic choice that pays off practically. Oversized silhouettes are currently the dominant shape in contemporary streetwear and casual fashion. Additionally, the looser cut means the back panel sits relatively flat, which reduces fabric distortion and makes your design placement more readable. That’s a smart structural decision by the contributor.
The sage green colorway of the shirt itself is on-trend — muted, earthy tones have dominated apparel collections across the streetwear and workwear categories for several seasons. However, the real genius here is that the garment color recedes visually once you drop your own design onto the Smart Object layer. The tee becomes a vehicle, not a statement.
Fabric Realism Index: How This Mockup Scores
I use a framework I call the Fabric Realism Index to evaluate apparel mockups across four criteria: natural drape, surface texture, light response, and shadow fidelity. This mockup scores exceptionally well on all four.
The cotton fabric shows subtle surface texture under the studio light — not enough to obscure a design, but enough to communicate that you’re looking at a real garment. The shoulder seams, collar ribbing, and sleeve hems all read with physical credibility. Furthermore, the lighting casts a soft directional shadow across the shoulder blade area, which adds genuine three-dimensionality. That shadow behavior is exactly what separates a photograph from a render, and it’s precisely what makes this mockup so convincing.
How to Use This T-Shirt Back View Photoshop Mockup
The workflow is straightforward. You open the file in Adobe Photoshop, locate the Smart Object layer in the Layers panel, and double-click to open the embedded canvas. You place your artwork — whether it’s a vector graphic, a rasterized illustration, or a typographic layout — save the Smart Object, and Photoshop automatically composites your design onto the shirt surface with all the fabric texture and lighting already baked in.
No manual distortion. No perspective matching. No blending mode gymnastics. The whole process takes under two minutes once you know the Smart Object workflow.
This ease of use matters enormously if you’re producing mockups at scale. For instance, if you’re running a print-on-demand store and need to generate back-view lifestyle images for thirty designs, a well-structured Smart Object file makes that feasible in an afternoon. Consequently, your product pages look professionally shot without scheduling a single studio session.
The Single-Surface Showcase System
One of my favorite practical applications for a mockup like this is what I call the Single-Surface Showcase System. The concept is simple: use one powerful, high-resolution mockup scene to communicate the entire visual identity of a collection or brand.
Rather than producing ten mediocre mockup variations, you invest in one scene that genuinely represents your aesthetic. You swap your designs through the Smart Object, maintain consistent lighting and staging, and build a visual coherence that carries across your entire presentation. Art directors, buyers, and creative directors respond to that kind of consistency. It signals professionalism and intentionality.
This back view mockup works exceptionally well within that system. The neutral staging, the fashion-forward silhouette, and the photographic quality make it a repeatable template that never looks dated.
Who Should Be Using This T-Shirt Mockup
The short answer: almost anyone in apparel design or brand identity work. But let me be more specific, because the use cases are genuinely varied.
Independent streetwear designers use this type of back-panel mockup to present collections to stockists and press contacts before samples are produced. Small brands use it for crowdfunding campaigns, pre-order pages, and lookbook layouts. Graphic designers use it when pitching t-shirt designs to clients — because a flat artwork file never communicates the same way a lifestyle image does.
Print-on-demand sellers benefit enormously from quality mockups. Platforms like Redbubble, Merch by Amazon, and Printful allow you to upload your own lifestyle imagery. Furthermore, sellers who use professional mockups consistently outperform those using default platform renders in click-through and conversion rates. The visual quality of your mockup is, effectively, your storefront display.
Brand identity designers also use apparel mockups as part of broader brand presentations. Showing a client’s new visual identity applied to a t-shirt — even in mockup form — makes the brand feel real and tangible in a way that brand board PDFs never quite achieve.
Back-First Presentation Method: A Strategic Case for Leading With the Rear View
Here’s a counterintuitive but effective strategy: lead your apparel presentation with the back view rather than the front. I call this the Back-First Presentation Method.
The logic is simple. Viewers expect to see the front of a shirt first. Therefore, showing the back first creates genuine visual surprise. It also signals that your back design is strong enough to anchor the whole presentation — which immediately elevates the perceived quality of the collection. If your back graphic is bold, well-composed, and shown on a quality mockup like this one, leading with it creates a strong first impression that carries through the rest of the presentation.
Try it the next time you build a client deck or a social media launch post. The reaction is usually very different from a standard front-facing opener.
Why High Resolution Matters More Than You Think
At 5056 × 3392 pixels, this file gives you significantly more flexibility than standard mockup files, which typically top out at 3000 pixels on the long edge. The difference matters for several specific scenarios.
First, print usage. If a client wants to use your mockup image in a printed lookbook, catalog, or retail poster, a file under 3000 pixels will show pixel degradation at large sizes. At 5056 pixels wide, you have room to print at full quality up to roughly 42 × 28 inches at 120 DPI — enough for large format retail display.
Second, cropping flexibility. With a high-resolution file, you can crop tightly to the design area and still have enough resolution for a high-quality square social media post. You’re not locked into the original composition. Additionally, you can export multiple crops from a single mockup session, giving you content for multiple formats without repeating any work.
Third, future-proofing. Screen resolutions are increasing across devices. A file that looks sharp today on a 4K monitor will continue to look sharp on whatever comes next. Low-resolution mockups age poorly. High-resolution ones don’t.
The Role of Model-Worn Mockups in Building Brand Credibility
There’s a meaningful difference between flat-lay mockups and model-worn mockups, and it’s not purely aesthetic. It’s psychological.
Flat-lay mockups isolate the garment. They’re useful for technical presentations, size comparisons, and detail shots. However, they don’t communicate how the shirt actually wears, moves, or fits. Model-worn mockups close that gap. They place the garment in a human context, which is ultimately the context where apparel exists and matters.
This particular back view mockup uses an over-the-shoulder pose that feels editorial rather than commercial. The model isn’t posed stiffly. She looks natural, slightly turned, as if caught between moments. That organic quality transfers to your design. Your artwork doesn’t appear pinned to a template — it appears worn by a real person in a real moment.
For brands that want to communicate authenticity and a design-forward aesthetic, that distinction is significant. Moreover, it’s the kind of visual quality that actually earns organic social media shares.
Apparel Mockup vs. Custom Photography: When Is a Mockup the Right Choice?
Custom photography is the gold standard. Nobody disputes that. However, a custom shoot for a single t-shirt design — factoring in model fees, photographer rates, studio rental, and post-production — will typically cost between $500 and $2,000 for a basic session. That’s a realistic budget for an established brand but not for a designer testing a new concept or launching a first collection.
A professional-quality t-shirt back view Photoshop mockup from Adobe Stock bridges that gap effectively. Furthermore, it gives you a consistent visual standard that holds across multiple designs without scheduling logistics. For early-stage brands and independent designers, this is genuinely the smart workflow.
The tipping point where custom photography becomes more cost-effective is typically at the point of a full production run — when you have samples in hand, a launch date confirmed, and a marketing budget allocated. Until that point, quality mockups are the professional standard.
Design Applications and Use Cases for This Mockup
The back panel of an oversized tee supports a remarkably wide range of design approaches. Let me walk through the strongest applications for this specific mockup.
Vertical typographic compositions work exceptionally well here. A tall, narrow word mark or a stacked sentence running down the spine of the back creates strong visual tension and reads clearly on the broad canvas of the back panel. The slight curvature of the fabric adds just enough organic movement to make the type feel alive rather than printed.
Large-scale abstract graphics — similar to the fluid swirling line graphic shown in the placeholder design visible in this mockup — photograph beautifully at this scale. The bold orange-red shape against the sage green shirt demonstrates exactly how high-contrast graphic elements interact with both the fabric color and texture. It’s a compelling preview of what’s possible.
Oversized illustration work — hand-drawn or digital — benefits enormously from the photographic texture of a real shirt. Line quality, texture, and detail read more richly on fabric than they do in a flat digital mockup.
Brand identity presentations gain instant credibility when apparel mockups are included. Showing a client’s new logo system on a well-photographed back view tee is a standard move in identity design for good reason. It makes abstract brand decisions feel tangible and considered.
Sourcing Quality Mockups Through Adobe Stock
Adobe Stock has become one of the most reliable sources for professional-grade apparel mockups, and there are structural reasons for that. Contributors go through a review process, file quality is vetted, and the integration with Adobe Creative Cloud means you can license assets directly within Photoshop without breaking your workflow.
Furthermore, the contributor community on Adobe Stock tends to produce mockups that reflect current fashion aesthetics rather than generic commercial imagery. This particular file from contributor 72 exemplifies that trend — the oversized fit, the muted colorway, and the editorial pose all reflect a contemporary visual language that resonates with design-forward audiences.
When you license a mockup through Adobe Stock, you also receive a commercial license that covers most professional use cases, including client presentations, marketing materials, and e-commerce product pages. That legal clarity matters when you’re building a professional brand.
Final Thoughts: The Back of the Shirt Is Having a Moment
Back panel design is genuinely having a cultural moment right now. Oversized back graphics are everywhere — from independent streetwear labels to high-fashion collaborations. And as that visual language becomes more prevalent, the quality of how you present back panel designs becomes more important.
This t-shirt back view Photoshop mockup is exactly the kind of tool that enables professional-quality presentation without a professional-level budget. The resolution is generous. The staging is smart. The fabric reads convincingly. And the Smart Object workflow makes it immediately usable for any designer with basic Photoshop familiarity.
If you’re serious about apparel design, brand identity work, or print-on-demand selling, quality mockups aren’t a nice-to-have — they’re a fundamental part of how your work gets perceived and valued. This file earns its place in that toolkit without question.
Frequently Asked Questions About T-Shirt Back View Photoshop Mockups
What is a t-shirt back view Photoshop mockup?
A t-shirt back view Photoshop mockup is a professionally photographed or rendered image of a shirt from the rear angle, prepared with a Smart Object layer in Photoshop. You place your design into the Smart Object, and the file automatically applies fabric texture, lighting, and shadow to your artwork, making it appear printed on the garment. This approach gives designers a fast, realistic way to present apparel graphics without producing physical samples.
How do I place my design into a Smart Object mockup?
Open the mockup file in Adobe Photoshop. In the Layers panel, locate the Smart Object layer — it typically has a small icon in the corner of the layer thumbnail. Double-click that layer to open the Smart Object canvas. Paste or drag your design artwork onto the canvas, position it correctly, and save the file using Ctrl+S (Windows) or Cmd+S (Mac). Photoshop immediately updates the main mockup file with your design composited onto the shirt.
What resolution is this t-shirt mockup file?
This mockup file measures 5056 × 3392 pixels, which makes it suitable for both web and professional print use. The high resolution gives you flexibility to crop for social media formats, export for large-format printing, or use the image in printed lookbooks and catalogs without quality loss.
Can I use this t-shirt mockup for commercial projects?
Assets licensed through Adobe Stock come with a commercial license that covers most professional use cases, including client presentations, e-commerce product listings, social media marketing, and printed promotional materials. Always review the specific license terms on Adobe Stock’s licensing page to confirm coverage for your intended use case.
What kinds of designs work best on a t-shirt back view mockup?
Back panel presentations work especially well for large-scale graphics, vertical typographic compositions, oversized illustrations, abstract shapes, and full-panel artwork. The broad, relatively flat surface of the back panel accommodates bold, high-contrast designs particularly well. Horizontal text layouts, spine-running type treatments, and centered illustrations are all strong choices for back panel design.
Is this t-shirt mockup suitable for print-on-demand product listings?
Yes. Print-on-demand platforms like Redbubble, Merch by Amazon, Printful, and Printify allow sellers to upload custom product images alongside default platform renders. Sellers who use professional mockup photography in their listings consistently see higher engagement and conversion rates compared to those using only default renders. This high-resolution back view mockup produces images well within the quality standards required by all major print-on-demand platforms.
What is the Fabric Realism Index mentioned in this article?
The Fabric Realism Index is an evaluative framework introduced in this article to assess the visual credibility of apparel mockups. It measures a mockup across four criteria: natural drape, surface texture, light response, and shadow fidelity. A mockup that scores well on all four reads as a genuine garment photograph rather than a digital composite, which directly affects how credible and professional your design presentations appear.
What does the Rear Canvas Principle mean for apparel design?
The Rear Canvas Principle is a design strategy framework introduced in this article. It argues that the back of a t-shirt functions as an independent, often more expressive visual field compared to the chest. Under this principle, designers treat the back panel as prime creative real estate rather than a secondary surface — using large-scale graphics, vertical compositions, and bold typography that would compete with itself on the front. Presenting back designs with professional-quality mockups is a core part of executing this principle effectively.
You can find more graphic design templates here on WE AND THE COLOR.


